

Repairing a Cracked Radius Rod
After pulling the rear wheel to check the brakes, I discovered that the rear radius rod was cracked. (Figure 1) is a photograph of the crack.
Figure 1
The next recourse is to take the radius rod off and see how bad the crack is.
Unbolt the two bolts seen on the right side of the brake plate in (Figure 1), above and below the brake cam. That will free the radius rod from the rear hub. Then, you need to disconnect the radius rod in the front. (Figure 2) displays a picture of the front connection.


Figure 2
You must remove the cotter pin from the nut closest to the transmission. Then, with a 7/8-inch wrench, loosen and remove the front nut. At this point, the rod will loosen up. You must back off the front radius rod retaining rear nut prior to removing the radius rod, in order to provide clearance at the rear. You will need to remove the brake rod also, so the brake cam may be rotated to clear the rear radius rod. This is a good time to order new clevis pins, and replace the aging cotter pins. The clevis pins come in standard and oversize. If they are really loose, order both and fit them. The cost is about $1.00 for four.
Remove the front brake rod, clevis cotter pin, and clevis pin, and then drop the front of the rod. Then do the same in the rear. Extract the brake rod by pulling it to the rear, through the brake rod support, located halfway up the radius rod. You can take this bracket off when the radius rod is removed.
Now, the radius rod should come off.
Now, the damage is seen up close and personal.
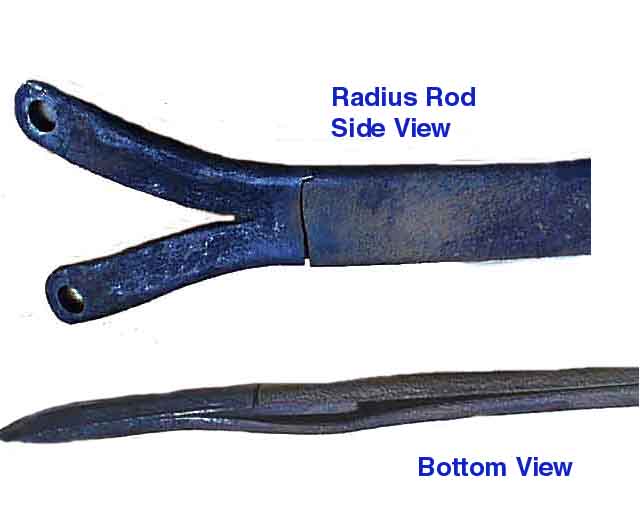
Figure 3
As we can see, there is a solid fork for the rear mounting bolts. This needs to be welded to keep it from breaking off. The length of the radius rod is hollow and split at the bottom, to allow water to drain. Still, it needs to be pressed back together and tack welded to avoid future splitting and aid in reinforcement.
Finding a reliable source for welding repair is a chore. Most folks don’t want to deal with small repairs, and want big bucks. I hounded a welder until I could corner him and arrange a meet time. It cost $10.00 to get this welded, so I gave him $20.00 for his trouble, and making a future reference for a possible trailer fabricator.
The below photo in (figure 4) displays the repair.
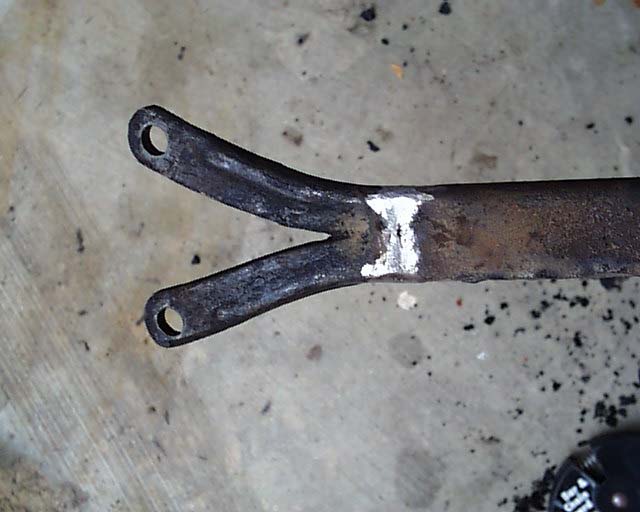
Figure 4
Here is another shot of the underside where it was straightened and tack welded.

Figure 5
You must then grind the welds down to see if they are solid, and then wirewheel the entire rod to prepare for priming. If this is done correctly, and primed and painted with a good rust preventive paint, it will serve many more years without need of replacement.
Now, comes the priming stage.

Figure 6
I have a professionally designed high tech painting jig (sic) where I prime and paint the parts. Give a good coat to conceal the rust and create a foundation on which the paint is layered.
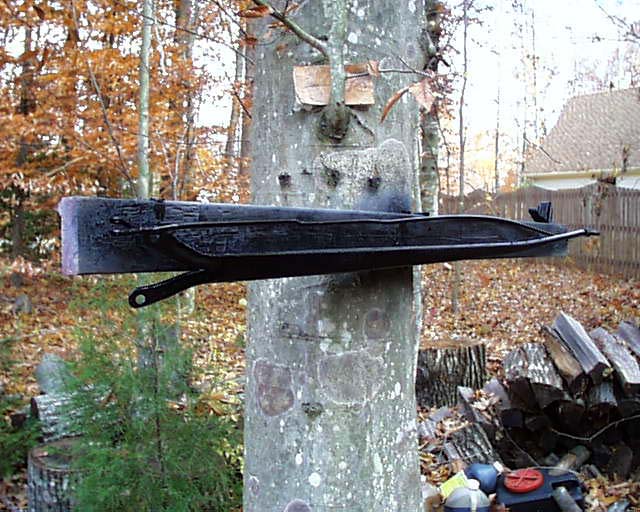
Figure 7
It’s now starting to take some resemblance to the original part. The next step would be to complete the rear hub rebuild and then reassemble the radius rod.
Finished Product
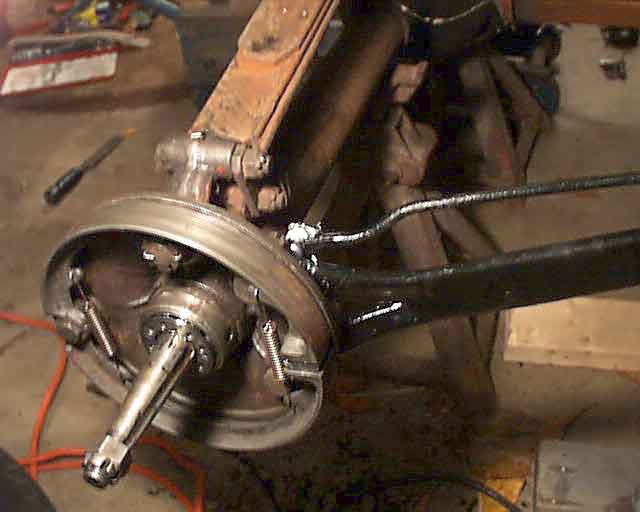
Figure 8
